When it comes to summer barbecues, few things compete with the aroma of grilled chicken wafting through the backyard. For me, it’s not just about any chicken; it’s about beer can chicken.
Yes, this delightful dish has not only become a staple in my grilling repertoire but has also brought together friends, family, and laughter around my table. If you’re looking to impress at your next cookout, this is the ticket.
Let’s dive in.

What is the Best Beer Can Chicken?
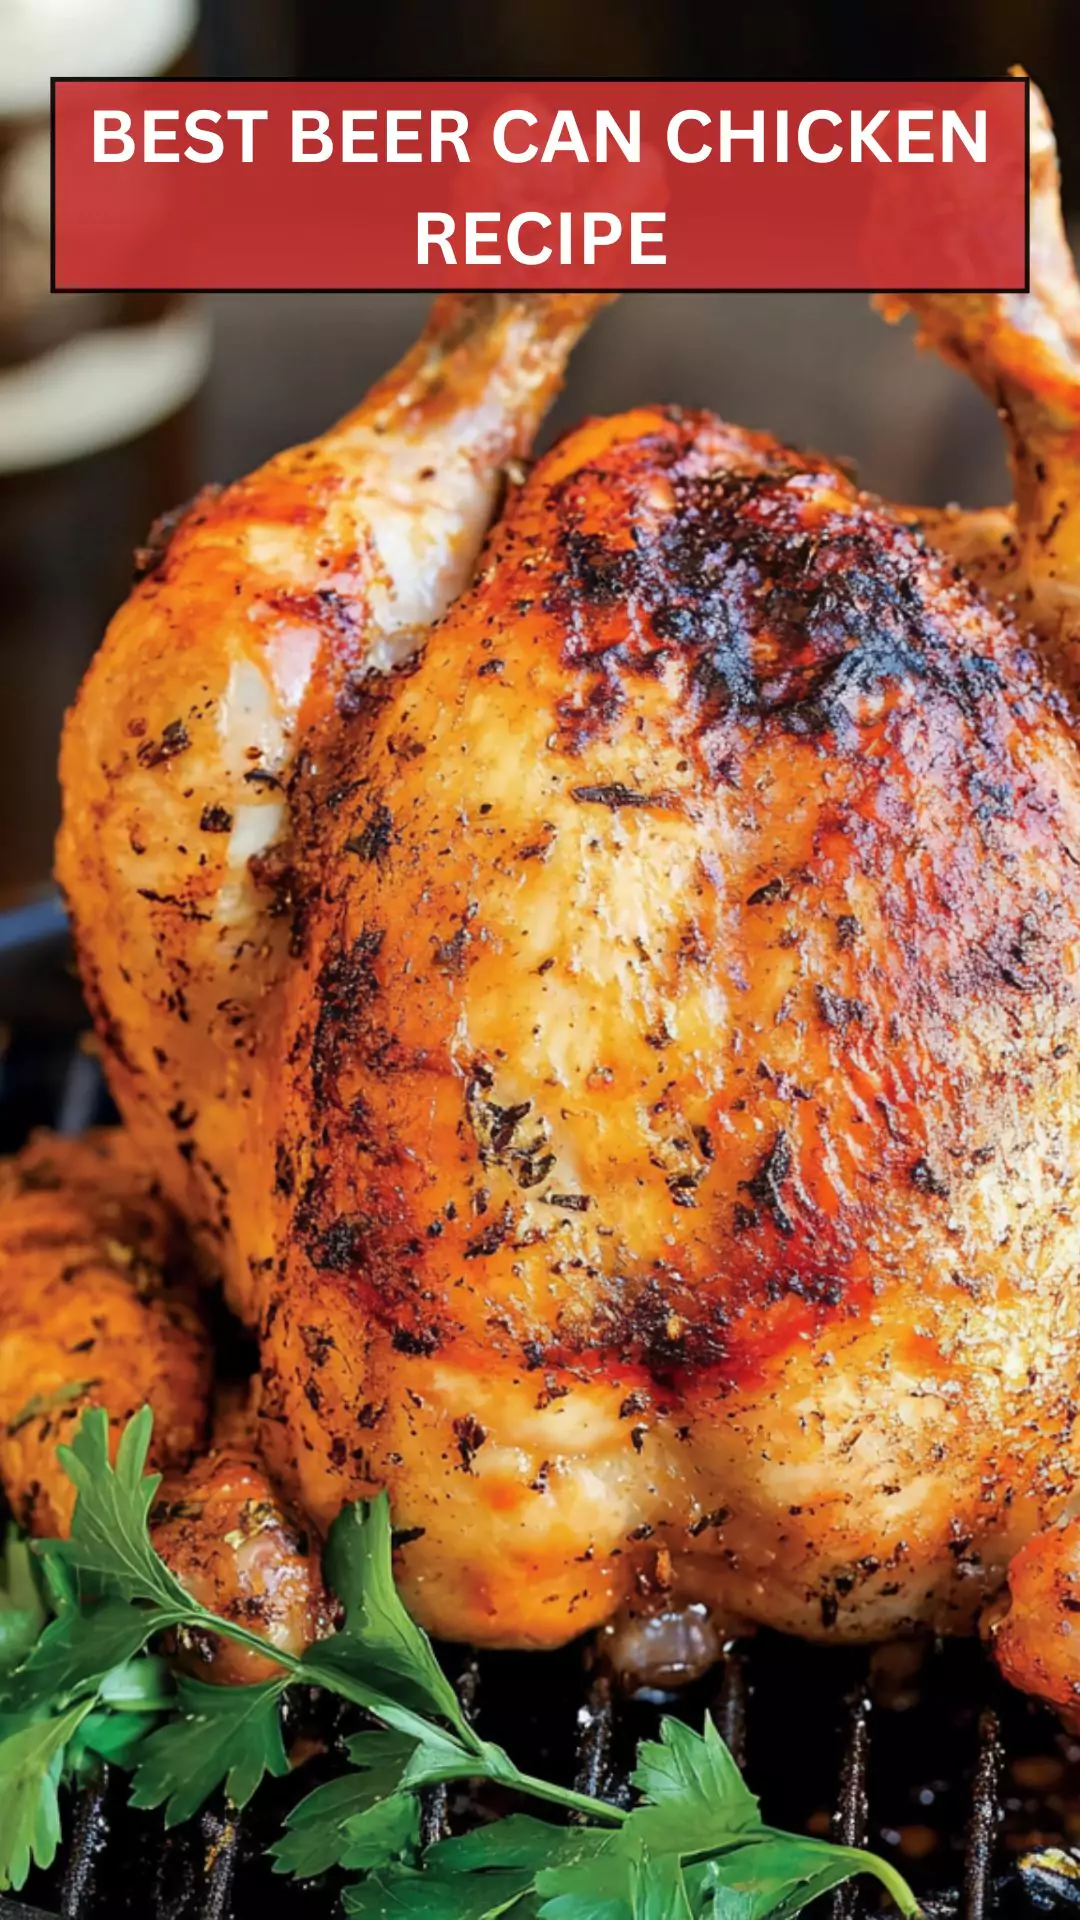
Picture this: A whole chicken, perfectly seasoned, sitting upright on a half-open can of beer, spinning slowly on the grill.
The beer steams the chicken from the inside out while locking in moisture, creating juicy, flavorful meat with a crispy exterior. The result? It’s nothing short of a culinary masterpiece.
This method isn’t just about the beer (though it sure helps). It’s about creating a juicy bird that happens to be a showstopper at any gathering. You’ll soon understand why this method of cooking chicken has soared in popularity over the years.
You will also like the following Dinner recipes!
- Best Pan Fried Skinless Chicken Thighs Recipe
- How to make Lemon Roasted Cornish Hens
- Easy Chipotle Mexican Grill Burrito Bowl Recipe
Why You’ll Love This Best Beer Can Chicken
There’s a certain magic with beer can chicken that elevates a simple meal into something extraordinary. I promise this method will have you singing its praises. Here’s why:
Flavor Explosion: The combination of beer and spices penetrates deeply, making every bite a flavorful delight. You’ll taste hints of garlic and herbs dancing on your palate.
Juicy Perfection: The steam works wonders, keeping the meat moist while the outside crisps up beautifully. There’s nothing worse than dry chicken. Trust me, this won’t be a problem here.
Easy to Prepare: If you’ve got a grill and can follow a few simple steps, you’re already halfway there. The prep is quick; then you can sit back and relax with a drink while it cooks.
Crowd Favorite: This dish tends to impress. Once you serve it, your friends will be blown away. Expect to see jaws drop when you unveil your masterpiece.
Versatile: You can switch up the seasonings and even the beer to customize flavors. The beer can chicken is essentially a blank canvas awaiting your culinary touch.
Now, let’s gather our ingredients for the best beer can chicken experience.
The Ingredients
Getting your ingredients right sets the groundwork for success. Here’s what you’ll need:
- 1 tablespoon garlic powder
- 1 tablespoon freshly ground black pepper
- 1 tablespoon coarse sea salt or kosher salt
- 2 tablespoons freshly chopped thyme leaves (or 1 tablespoon dried thyme)
- 1 teaspoon smoked paprika
- 1 (4-pound) whole chicken
- 2 tablespoons olive oil (extra virgin or vegetable oil)
- 1 (12-ounce) can of beer, room temperature, opened and half-drunk
I’m telling you, these ingredients create a flavor profile that tantalizes the taste buds while keeping the chicken moist.

Step by Step Instructions
Shall we jump into the process? Let’s do it! These steps will guide you in making the best beer can chicken that your friends will rave about for weeks.
Step 1: Prepare the Chicken
Start with your star ingredient—the chicken. Pat it dry, giving it a little love with paper towels. This helps create that marvelous crispy skin. Once it’s dry, rub olive oil all over it, making sure every crevice is coated.
Step 2: Season the Chicken
It’s showtime for the spices! In a small bowl, mix garlic powder, black pepper, sea salt, thyme, and smoked paprika.
Use your hands to apply this spice mix generously all over the chicken. Make sure to get in between the skin and the meat for maximum flavor. Think of it as giving your chicken a nice spa day.
Step 3: Get the Grill Ready
Prepare your grill for indirect cooking. If you’re using a gas grill, turn on one side to medium heat, leaving the other side off.
If you’re working with charcoal, push the coals to one side, creating a hot zone and a cool zone.
Step 4: The Beer Can Magic
Open your can of beer—remember, it should be half-drunk. Now, place it in the chicken’s cavity. It’s like giving your chicken a drink. Place the chicken upright on the grill over the cool side. This helps it roast beautifully.
Step 5: Grill Away
Close the lid and let it do its magic. Maintain a grill temperature of about 350°F. Ideally, the chicken will need about 1 to 1.5 hours to fully cook, depending on its size and your grill. Grab a cold one, sit back, and enjoy the delicious aroma wafting through the air.
Step 6: Check for Doneness
Using a meat thermometer, check the thickest part of the chicken (usually the thigh). You want it to hit 165°F. Once done, carefully remove the chicken from the grill, allowing it to rest for at least 10 minutes.
Step 7: Carving Time
Now for the best part—dig in! Carve the chicken, serve it up, and get ready for the impressed faces. Bonus points if you can keep a straight face while your guests ask how you pulled it off.
Tips & Tricks
Mastering the art of beer can chicken is easy with a few pro tips. Here are some pointers to keep your chicken juicy, flavorful, and perfectly grilled.
- Choose the Right Beer: A light lager or ale works wonders. Avoid stout or excessively hoppy beers, as they can overpower the chicken’s flavor.
- Let it Rest: After grilling, patience pays off. Letting it rest for a bit helps redistribute the juices throughout the meat.
- Season the Can: Don’t be shy about adding a pinch of seasoning to the beer inside the can. It will add a little extra flavor to the steam.
- Experiment with Flavors: Don’t hesitate to get adventurous. Try using flavored beers like shandy for a citrusy twist or a honey beer for some sweetness.
- Safety First: When removing the chicken from the grill, be cautious of the steaming beer. It can get very hot—use tongs to handle the can carefully.

Can I Store Best Beer Can Chicken?
Absolutely! Any leftovers can be stored in an airtight container in the fridge for about 3-4 days. If you want to extend its life, you can always freeze the shredded chicken for up to 3 months. Just make sure to keep it well-wrapped or in a freezer-safe bag.
What Can I Serve with Best Beer Can Chicken?
Beer can chicken is fantastic on its own, but pairing it right can elevate your meal. Some excellent side dish options include:
- Grilled Vegetables: Zucchini, bell peppers, and corn work beautifully alongside chicken.
- Potato Salad: A classic that never disappoints.
- Cornbread: Sweet and fluffy, it complements the chicken perfectly.
- Coleslaw: Crunchy slaw adds a refreshing contrast to the juicy chicken.
- Baked Beans: Hearty and delicious, they round out the meal well.
Variations of Best Beer Can Chicken
Getting creative is half the fun! Here are some ways to mix things up:
- Spicy Beer Can Chicken: Add cayenne pepper or chili powder to your spice mix for a kick. This version will have your taste buds dancing.
- Citrus Twist: Use a can of lemon-lime soda or orange soda instead of beer. The result? A bright, zesty flavor profile.
- Herb-Infused Chicken: Go heavy on fresh herbs. Basil, rosemary, and oregano can work wonders. They’ll add a fragrant aroma that’s hard to resist.
- BBQ Glaze: Brush the chicken with your favorite barbecue sauce in the last 20 minutes of cooking. This results in a sticky, caramelized outer layer.
- Garlic Butter Beer Can Chicken: Soften butter and mix in minced garlic and herbs. Rub this mixture under the skin for an utterly decadent version.
Best Beer Can Chicken Recipe
Equipment
- Meat thermometer
Ingredients
- – 1 tablespoon garlic powder
- – 1 tablespoon freshly ground black pepper
- – 1 tablespoon coarse sea salt or kosher salt
- – 2 tablespoons freshly chopped thyme leaves or 1 tablespoon dried thyme
- – 1 teaspoon smoked paprika
- – 1 4-pound whole chicken
- – 2 tablespoons olive oil extra virgin or vegetable oil
- – 1 12-ounce can of beer, room temperature, opened and half-drunk
Instructions
- Shall we jump into the process? Let’s do it! These steps will guide you in making the best beer can chicken that your friends will rave about for weeks.
Step 1: Prepare the Chicken
- Start with your star ingredient—the chicken. Pat it dry, giving it a little love with paper towels. This helps create that marvelous crispy skin. Once it’s dry, rub olive oil all over it, making sure every crevice is coated.
Step 2: Season the Chicken
- It’s showtime for the spices! In a small bowl, mix garlic powder, black pepper, sea salt, thyme, and smoked paprika.
- Use your hands to apply this spice mix generously all over the chicken. Make sure to get in between the skin and the meat for maximum flavor. Think of it as giving your chicken a nice spa day.
Step 3: Get the Grill Ready
- Prepare your grill for indirect cooking. If you’re using a gas grill, turn on one side to medium heat, leaving the other side off.
- If you’re working with charcoal, push the coals to one side, creating a hot zone and a cool zone.
Step 4: The Beer Can Magic
- Open your can of beer—remember, it should be half-drunk. Now, place it in the chicken’s cavity. It’s like giving your chicken a drink. Place the chicken upright on the grill over the cool side. This helps it roast beautifully.
Step 5: Grill Away
- Close the lid and let it do its magic. Maintain a grill temperature of about 350°F. Ideally, the chicken will need about 1 to 1.5 hours to fully cook, depending on its size and your grill. Grab a cold one, sit back, and enjoy the delicious aroma wafting through the air.
Step 6: Check for Doneness
- Using a meat thermometer, check the thickest part of the chicken (usually the thigh). You want it to hit 165°F. Once done, carefully remove the chicken from the grill, allowing it to rest for at least 10 minutes.
Step 7: Carving Time
- Now for the best part—dig in! Carve the chicken, serve it up, and get ready for the impressed faces. Bonus points if you can keep a straight face while your guests ask how you pulled it off.
Notes
- Choose the Right Beer: A light lager or ale works wonders. Avoid stout or excessively hoppy beers, as they can overpower the chicken’s flavor.
- Let it Rest: After grilling, patience pays off. Letting it rest for a bit helps redistribute the juices throughout the meat.
- Season the Can: Don’t be shy about adding a pinch of seasoning to the beer inside the can. It will add a little extra flavor to the steam.
- Experiment with Flavors: Don’t hesitate to get adventurous. Try using flavored beers like shandy for a citrusy twist or a honey beer for some sweetness.
- Safety First: When removing the chicken from the grill, be cautious of the steaming beer. It can get very hot—use tongs to handle the can carefully.
Nutrition
Frequently Asked Questions
1. Can I use a different type of drink besides beer?
Yes! While beer is traditional, soda, cider, or even white wine can all work. Each brings different flavors, so have fun experimenting.
2. Is beer can chicken safe to eat if the beer is alcoholic?
Yes! The chicken cooks thoroughly, and any alcohol content evaporates during grilling. What you get are enhanced flavors, not a buzz.
3. What if I don’t have a grill?
No problem. You can bake beer can chicken in the oven at 375°F. It will take about 1.5 hours. Ensure the chicken is upright in a suitable pan to catch drippings.
4. What’s the best way to know when the chicken is done?
Utilizing a meat thermometer is the best method. Aim for 165°F in the thickest part of the thigh to ensure it’s cooked safely and perfectly.
5. Can I marinate the chicken overnight?
Absolutely! Marinating it can enhance flavor. Just remember to dry the chicken before applying the olive oil and spices.
Conclusion
Beer can chicken is more than just a cooking method; it’s a celebration of flavors and community. With each tender bite, you’re not just tasting the meal, you’re experiencing the delight of gathering around the grill with loved ones.
The beauty lies in its simplicity, while the rewards are nothing short of extraordinary. Whether you follow the steps to the letter or let your creativity run wild, happiness is guaranteed to follow.
So, fire up that grill, crack open a beer, and get ready to create memorable moments with the best beer can chicken. Trust me; it’ll be a summer highlight that you won’t want to miss. Enjoy!
You’ll also like these latest recipes!
- Best Chipotle Mexican Grill Chicken Marinade recipe
- How to make Cheese Stuffed Portobello Mushrooms
- Easy Chicken Noodle Soup Recipe