Best Beer Can Chicken Recipe
When it comes to summer barbecues, few things compete with the aroma of grilled chicken wafting through the backyard. For me, it’s not just about any chicken; it’s about beer can chicken.
Equipment
- Meat thermometer
Ingredients
- – 1 tablespoon garlic powder
- – 1 tablespoon freshly ground black pepper
- – 1 tablespoon coarse sea salt or kosher salt
- – 2 tablespoons freshly chopped thyme leaves or 1 tablespoon dried thyme
- – 1 teaspoon smoked paprika
- – 1 4-pound whole chicken
- – 2 tablespoons olive oil extra virgin or vegetable oil
- – 1 12-ounce can of beer, room temperature, opened and half-drunk
Instructions
- Shall we jump into the process? Let’s do it! These steps will guide you in making the best beer can chicken that your friends will rave about for weeks.
Step 1: Prepare the Chicken
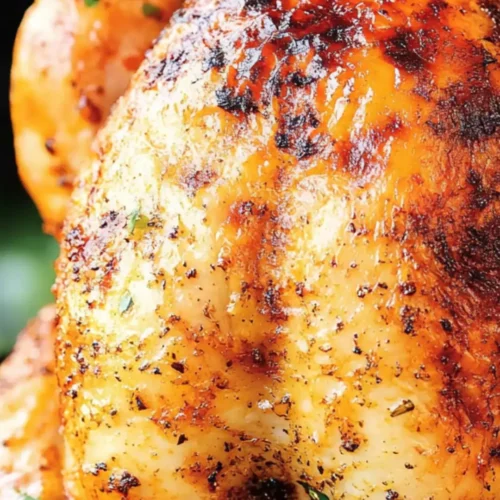
- Start with your star ingredient—the chicken. Pat it dry, giving it a little love with paper towels. This helps create that marvelous crispy skin. Once it’s dry, rub olive oil all over it, making sure every crevice is coated.
Step 2: Season the Chicken
- It’s showtime for the spices! In a small bowl, mix garlic powder, black pepper, sea salt, thyme, and smoked paprika.
- Use your hands to apply this spice mix generously all over the chicken. Make sure to get in between the skin and the meat for maximum flavor. Think of it as giving your chicken a nice spa day.
Step 3: Get the Grill Ready
- Prepare your grill for indirect cooking. If you’re using a gas grill, turn on one side to medium heat, leaving the other side off.
- If you’re working with charcoal, push the coals to one side, creating a hot zone and a cool zone.
Step 4: The Beer Can Magic
- Open your can of beer—remember, it should be half-drunk. Now, place it in the chicken’s cavity. It’s like giving your chicken a drink. Place the chicken upright on the grill over the cool side. This helps it roast beautifully.
Step 5: Grill Away
- Close the lid and let it do its magic. Maintain a grill temperature of about 350°F. Ideally, the chicken will need about 1 to 1.5 hours to fully cook, depending on its size and your grill. Grab a cold one, sit back, and enjoy the delicious aroma wafting through the air.
Step 6: Check for Doneness
- Using a meat thermometer, check the thickest part of the chicken (usually the thigh). You want it to hit 165°F. Once done, carefully remove the chicken from the grill, allowing it to rest for at least 10 minutes.
Step 7: Carving Time
- Now for the best part—dig in! Carve the chicken, serve it up, and get ready for the impressed faces. Bonus points if you can keep a straight face while your guests ask how you pulled it off.
Notes
Mastering the art of beer can chicken is easy with a few pro tips. Here are some pointers to keep your chicken juicy, flavorful, and perfectly grilled.
- Choose the Right Beer: A light lager or ale works wonders. Avoid stout or excessively hoppy beers, as they can overpower the chicken’s flavor.
- Let it Rest: After grilling, patience pays off. Letting it rest for a bit helps redistribute the juices throughout the meat.
- Season the Can: Don’t be shy about adding a pinch of seasoning to the beer inside the can. It will add a little extra flavor to the steam.
- Experiment with Flavors: Don’t hesitate to get adventurous. Try using flavored beers like shandy for a citrusy twist or a honey beer for some sweetness.
- Safety First: When removing the chicken from the grill, be cautious of the steaming beer. It can get very hot—use tongs to handle the can carefully.
Nutrition
Serving: 548gCalories: 1147kcalCarbohydrates: 6gProtein: 113gFat: 71.4gCholesterol: 406mgSodium: 2278mgSugar: 1g
Tried this recipe?Let us know how it was!