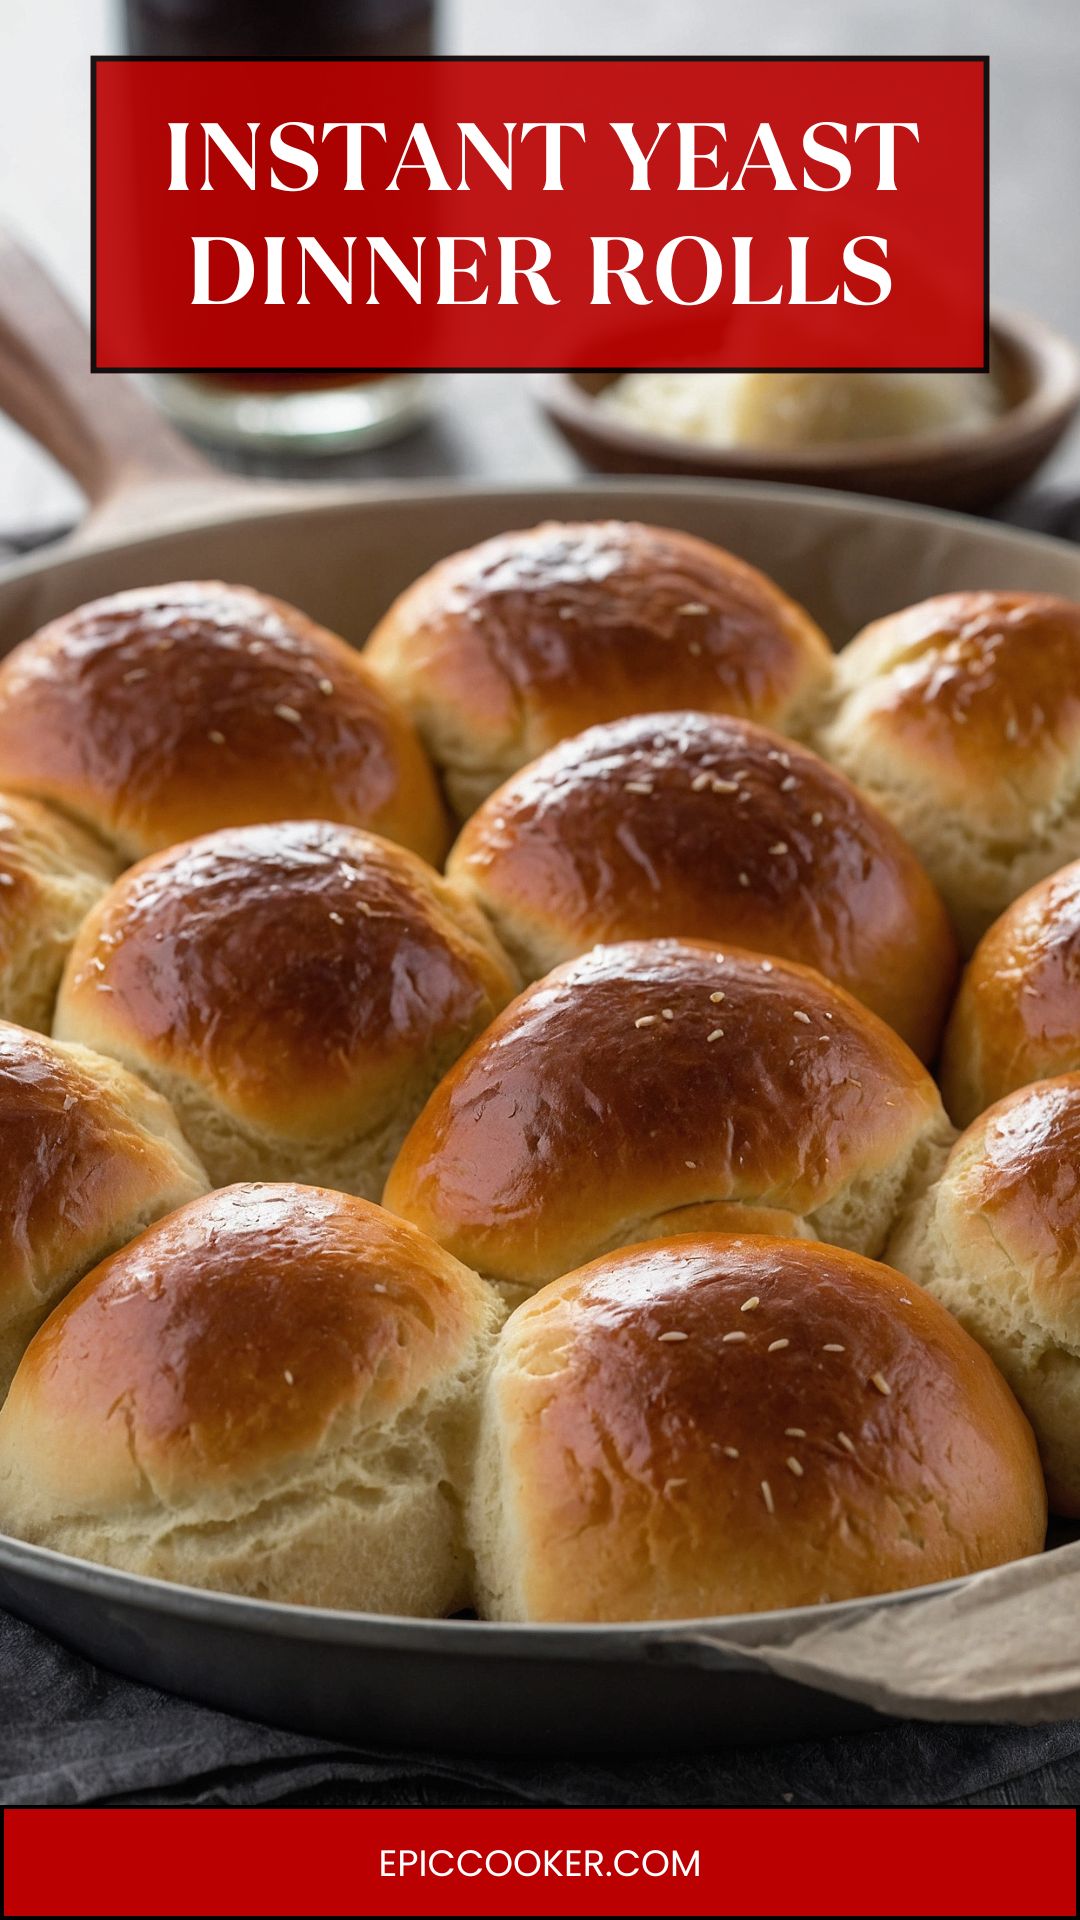
There’s something magical about the smell of freshly baked bread wafting through your home. Instant yeast dinner rolls can transform any meal from good to extraordinary.
A cozy dinner with family or friends, laughter filling the air, and then someone passes a warm basket of rolls. It’s a simple gesture, but it speaks volumes.
These rolls are not just food; they are a symbol of warmth, togetherness, and hospitality.
I have baked countless rolls in my kitchen, but the joy of pulling out a fluffy, golden batch of instant yeast dinner rolls never fades.
They are the perfect accompaniment to almost any dish. Let me take you on a journey through the enchanting world of baking these delightful rolls.

What Are Instant Yeast Dinner Rolls?
Instant yeast, also known as quick yeast, is a baker’s best friend. Unlike active dry yeast, it doesn’t need to be activated in water before use.
You simply mix it right into your ingredients. This makes the process of making dinner rolls simple and straightforward. These rolls are soft, airy, and slightly sweet, making them an ideal partner for savory dishes or even enjoyed on their own.
When I first experimented with instant yeast, I was amazed at the results. The rolls rose beautifully, and the texture was light and fluffy. No waiting around for the yeast to proof—just bake and enjoy!
You will also like the following Dinner recipes!
- Sheet Pan Sausage And Veggies
- Delicious Chicken Noodle Soup
- How to make Pan Fried Skinless Chicken Thighs
Why You’ll Love Instant Yeast Dinner Rolls?
You might be wondering, why go through the effort of making dinner rolls when you could just grab a loaf at the store?
Well, let me tell you, homemade rolls are in a league of their own. These rolls are not only easy to make but also incredibly satisfying.
1. Simplicity: With just a few ingredients and straightforward steps, you can whip up these rolls without breaking a sweat.
2. Freshness: There’s nothing like the taste of warm bread right out of the oven. Store-bought bread can’t compete with that freshness.
3. Versatility: Enjoy them with dinner, turn them into sliders, or use them for breakfast with a spread of jam or butter.
4. Kid-Friendly: Kids adore these rolls! Their fluffy texture and slightly sweet flavor make them irresistible.
5. Make-Ahead Option: These rolls can be made ahead of time and frozen. Just thaw and warm them when you need them.
The Ingredients
Let’s get down to the basics. You’ll need the following ingredients, most of which you likely have in your pantry:
- 3-4 cups plain all-purpose flour
- 1 tablespoon quick-acting yeast
- 1 cup lukewarm water (around 110°F)
- 1 large egg
- 2 tablespoons unsalted butter, melted
- 2 tablespoons granulated white sugar
- ¼ cup unsalted butter, softened at room temperature
- 1 tablespoon honey
- 1 teaspoon vanilla extract

Step-by-Step Instructions
Let’s dive into the step-by-step process of making these delightful rolls. I can promise you that with each step, you’ll feel the excitement build!
Step 1: Combine Dry Ingredients
In a large mixing bowl, combine 3-4 cups of all-purpose flour, 1 tablespoon of instant yeast, and 2 tablespoons of granulated sugar. Mix them well using a whisk. It’s essential to ensure that the yeast is evenly distributed throughout the flour. This helps in uniform rising.
Step 2: Add Wet Ingredients
Once your dry ingredients are well mixed, create a well in the center. Pour in 1 cup of lukewarm water, 1 large egg, 2 tablespoons of melted butter, 1 tablespoon of honey, and 1 teaspoon of vanilla extract.
The lukewarm water should feel comfortably warm to the touch—too hot and you could kill the yeast, and too cool won’t activate it effectively.
Step 3: Mix the Dough
Using a wooden spoon or a spatula, mix the wet and dry ingredients together until a rough dough forms. It might seem a bit sticky; don’t worry, that’s how it should be.
Step 4: Knead the Dough
Turn the dough out onto a lightly floured surface. Knead it for about 5-10 minutes. You want to develop that gluten.
The dough should become smooth and elastic. If it’s too sticky, add a little more flour. Remember, a good roll has both weight and structure.
Step 5: First Rise
Form the dough into a ball and place it in a greased bowl. Cover it with a clean kitchen towel and let it rise for about 30-45 minutes, or until it has doubled in size.
This is an excellent time to clean up your workspace or prepare a side dish for dinner.
Step 6: Shape the Rolls
Once the dough has risen, punch it down gently to release any air. Turn it out onto a floured surface again.
Divide the dough into 12 equal pieces. Shape each piece into a ball and place them in a greased baking pan. They should be snug but not overly crowded.
Step 7: Second Rise
Cover the shaped rolls with a kitchen towel and let them rise again for 30 minutes. This second rise allows them to become fluffy.
Step 8: Preheat Your Oven
Preheat your oven to 375°F (190°C). While it heats, the rolls will complete their rising process.
Step 9: Bake the Rolls
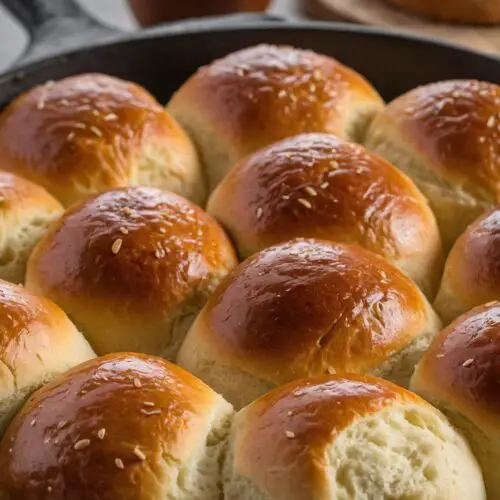
Before baking, brush the tops of the rolls with ¼ cup of softened butter. This gives them a glossy finish and adds flavor. Bake for about 20-25 minutes or until golden brown.
Step 10: Enjoy!
Once out of the oven, allow the rolls to cool for a few minutes. Then, serve them warm. You’ll see people’s eyes light up as they take their first bite!
Tips & Tricks
To make the process even smoother, here are some handy tips that I’ve learned:
- Use Room Temperature Ingredients: Ensuring your egg and butter are at room temperature can help with even mixing.
- Don’t Skip the Kneading: Proper kneading is crucial for good texture. If you have a stand mixer, use the dough hook attachment.
- Watch the Temperature: If your house is too cool, the dough may take longer to rise. Consider placing it in a slightly warm oven (turned off) to aid the rising.
- Experiment with Flavors: Add fresh herbs or garlic powder to the dough for a twist on flavor.
- Use Parchment Paper: For easy removal from the baking pan, line the pan with parchment paper before placing the rolls in.
Nutrition Information
Instant Yeast Dinner Rolls Nutrition Facts

Can I Store Instant Yeast Dinner Rolls?
Absolutely! These rolls can be stored in an airtight container at room temperature for 2-3 days. If you want to keep them longer, pop them in the freezer. Just be sure to wrap them tightly in plastic wrap or aluminum foil. They can be frozen for up to 3 months.
To reheat, simply let them thaw at room temperature, then warm them in the oven for a few minutes.

What Can I Serve with Instant Yeast Dinner Rolls?
These rolls are versatile. Here are some ideas:
- Pair them with soups, such as a creamy tomato basil or hearty minestrone.
- Serve with a side of garlic butter for dipping.
- Use them as a base for sliders with burgers or pulled pork.
- Serve alongside roasted meats and vegetables for a cozy dinner.
- Enjoy them with a classic pasta dish, like spaghetti and meatballs.
Variations
Want to mix things up a bit? Here are five variations of instant yeast dinner rolls you might enjoy:
- Cheese-Stuffed Rolls: Take a piece of dough, flatten it, and place a small cube of cheese inside. Seal it up and bake. You’ll have delightful cheesy centers.
- Herb-Infused Rolls: Add dried herbs like oregano or rosemary to your dough for a fragrant twist. Perfect for serving with Italian dishes.
- Sweet Cinnamon Rolls: Before shaping, sprinkle the dough with cinnamon and sugar and roll it up. Cut into pieces, and bake. Top with icing for a sweet treat.
- Garlic Butter Rolls: Mix minced garlic with melted butter. Brush over the rolls before baking. This will give a savory flavor boost.
- Gluten-Free Rolls: Swap out the all-purpose flour for a gluten-free flour blend. Follow the same steps. Just make sure to check your yeast’s compatibility with gluten-free baking.
Instant Yeast Dinner Rolls
Equipment
- Mixing Bowl
Ingredients
- 3-4 cups plain all-purpose flour
- 1 tablespoon quick-acting yeast
- 1 cup lukewarm water around 110°F
- 1 large egg
- 2 tablespoons unsalted butter melted
- 2 tablespoons granulated white sugar
- ¼ cup unsalted butter softened at room temperature
- 1 tablespoon honey
- 1 teaspoon vanilla extract
Instructions
Step 1: Combine Dry Ingredients
- In a large mixing bowl, combine 3-4 cups of all-purpose flour, 1 tablespoon of instant yeast, and 2 tablespoons of granulated sugar. Mix them well using a whisk. It’s essential to ensure that the yeast is evenly distributed throughout the flour. This helps in uniform rising.
Step 2: Add Wet Ingredients
- Once your dry ingredients are well mixed, create a well in the center. Pour in 1 cup of lukewarm water, 1 large egg, 2 tablespoons of melted butter, 1 tablespoon of honey, and 1 teaspoon of vanilla extract.
- The lukewarm water should feel comfortably warm to the touch—too hot and you could kill the yeast, and too cool won’t activate it effectively.
Step 3: Mix the Dough
- Using a wooden spoon or a spatula, mix the wet and dry ingredients together until a rough dough forms. It might seem a bit sticky; don’t worry, that’s how it should be.
Step 4: Knead the Dough
- Turn the dough out onto a lightly floured surface. Knead it for about 5-10 minutes. You want to develop that gluten.
- The dough should become smooth and elastic. If it’s too sticky, add a little more flour. Remember, a good roll has both weight and structure.
Step 5: First Rise
- Form the dough into a ball and place it in a greased bowl. Cover it with a clean kitchen towel and let it rise for about 30-45 minutes, or until it has doubled in size.
- This is an excellent time to clean up your workspace or prepare a side dish for dinner.
Step 6: Shape the Rolls
- Once the dough has risen, punch it down gently to release any air. Turn it out onto a floured surface again.
- Divide the dough into 12 equal pieces. Shape each piece into a ball and place them in a greased baking pan. They should be snug but not overly crowded.
Step 7: Second Rise
- Cover the shaped rolls with a kitchen towel and let them rise again for 30 minutes. This second rise allows them to become fluffy.
Step 8: Preheat Your Oven
- Preheat your oven to 375°F (190°C). While it heats, the rolls will complete their rising process.
Step 9: Bake the Rolls
- Before baking, brush the tops of the rolls with ¼ cup of softened butter. This gives them a glossy finish and adds flavor. Bake for about 20-25 minutes or until golden brown.
Step 10: Enjoy!
- Once out of the oven, allow the rolls to cool for a few minutes. Then, serve them warm. You’ll see people’s eyes light up as they take their first bite!
Notes
- Use Room Temperature Ingredients: Ensuring your egg and butter are at room temperature can help with even mixing.
- Don’t Skip the Kneading: Proper kneading is crucial for good texture. If you have a stand mixer, use the dough hook attachment.
- Watch the Temperature: If your house is too cool, the dough may take longer to rise. Consider placing it in a slightly warm oven (turned off) to aid the rising.
- Experiment with Flavors: Add fresh herbs or garlic powder to the dough for a twist on flavor.
- Use Parchment Paper: For easy removal from the baking pan, line the pan with parchment paper before placing the rolls in.
Nutrition
Frequently Asked Questions
1. Can I use active dry yeast instead of instant yeast?
Yes, you can, but you’ll need to activate the yeast first. Mix it with warm water and a bit of sugar and let it sit until foamy before adding it to the dry ingredients.
2. What if my dough doesn’t rise?
If your dough doesn’t rise, it might be due to inactive yeast. Ensure your yeast is fresh, and the water isn’t too hot or cold. If all else fails, starting over is sometimes the best option.
3. Can I add seeds or nuts into the dough?
Absolutely! Feel free to fold in poppy seeds, sesame seeds, or even chopped nuts after kneading. Just don’t overdo it, as too many add-ins can alter the texture.
4. How can I ensure my rolls are soft?
The key to soft rolls is in the kneading. Make sure to develop the gluten properly, and don’t overbake them, as that will make them hard.
5. What’s the best way to reheat these rolls?
To maintain their softness, wrap them in foil and place them in a preheated oven at 350°F (175°C) for about 10-15 minutes.v
Conclusion
Making instant yeast dinner rolls is not just a culinary experience; it’s a way to bring people together. The aroma of fresh bread, the warmth of homemade goodness, and the smiles that follow are priceless.
Once you try this simple recipe, it’s likely to become a staple in your kitchen.
Whether you’re serving them at a family gathering, a holiday dinner, or just a Friday night in, these rolls will surely win hearts. So grab your apron, preheat your oven, and let’s bake some love!